Table of Contents
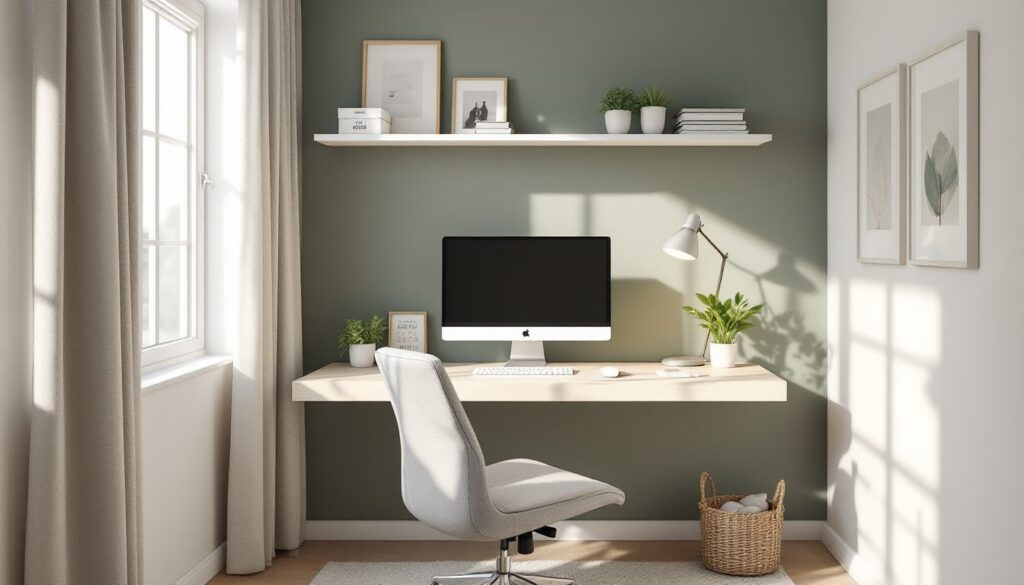
ToggleFloating shelves have become a staple in modern home offices, and for good reason. They deliver clean lines, maximize vertical space, and keep your workspace organized without the bulk of traditional cabinets. Whether you’re setting up a new office corner or refreshing an existing one, floating shelves offer both function and style. Unlike freestanding furniture, they mount directly to the wall, creating an open, airy feel that makes even a small office feel larger. Best of all, installing them is a weekend project that doesn’t require a contractor, just the right tools, wall studs, and a bit of patience.
Key Takeaways
- Office floating shelves maximize vertical storage space without consuming floor area, making small home offices feel larger and more open.
- Floating shelf installation requires proper stud placement and heavy-duty brackets rated for 25–50+ pounds, depending on load weight, ensuring safety and stability.
- French cleat and rod-and-bracket systems offer durable alternatives to traditional brackets, with French cleats providing flexibility for repositioning without new holes.
- Organize floating shelves by function and height, using negative space and varied visual weight to maintain an aesthetically pleasing and productive workspace.
- A well-designed floating shelf system can be completed as a weekend DIY project with basic tools—stud finder, level, drill, and anchors—making it ideal for both renters and homeowners.
Why Floating Shelves Transform Your Home Office
A floating shelf is a shelf that appears to hang on the wall with no visible support brackets or legs underneath. The magic lies in a hidden mounting system anchored directly into your wall studs, creating the illusion of a shelf suspended in mid-air.
In a home office, floating shelves solve the storage puzzle without eating floor space. You get room for books, plants, reference materials, and decorative pieces, all while keeping your desk and workspace clear. They also draw the eye upward, which makes the room feel taller and more open. Unlike a bookcase or filing cabinet pushed against the wall, floating shelves maintain sightlines and don’t clutter the visual landscape.
Floating shelves are equally practical for productivity. A well-organized shelf keeps frequently used items within arm’s reach: printer paper, notepads, a desk lamp, or a small plant to freshen the air. The open design means you’re not hiding things away, items stay visible and accessible. For renters, wall damage is minimal if mounted correctly, and removal leaves only small holes that drywall patch covers easily. For homeowners, they’re a permanent upgrade that adds resale appeal without requiring a full renovation.
Types Of Floating Shelves For Office Spaces
Wall-Mounted And Bracket-Based Options
The most common floating shelf uses heavy-duty brackets (also called floating shelf brackets or concealed brackets) installed into wall studs. A typical bracket set includes two or more brackets per shelf, rated for 25–50 pounds of weight depending on the model. The shelf itself, usually between 1.5 and 2 inches thick, slides over the brackets and is secured with screws or dowels from underneath, so fasteners stay hidden.
For a standard home office shelf holding books and light décor, look for brackets rated for 25–30 pounds minimum. If you’re mounting a printer or other heavy equipment, you’ll need brackets rated for 50+ pounds. Steel brackets are stronger than plastic, but wood or composite brackets can work for lighter loads and integrate better with natural wood shelves.
Another popular option is the French cleat system. This uses two interlocking wooden rails, one attached to the wall, one to the back of the shelf. It’s durable, works well on plaster or drywall, and distributes weight evenly across a larger area. French cleats are ideal if you need flexibility: the shelf can be lifted off and repositioned without new holes.
Hidden Support And Sleek Designs
For a truly minimalist look, rod-and-bracket systems offer a clean aesthetic. A metal rod (typically 1/2 inch diameter) inserts into a mounting block hidden inside the wall cavity or anchored to a wall stud. The shelf slips over the rod, and nothing shows except the shelf itself and the wall beneath it. These work best for shallow shelves (6–10 inches deep) and lighter loads.
Cantilevered shelves use an internal support beam that extends into the wall, bearing the weight on the internal structure rather than visible brackets. This is the most expensive option and usually requires professional installation, but the payoff is a completely clean underside with no visible support hardware whatsoever. For a home office, this is overkill unless aesthetics are your top priority and budget allows.
How To Install Floating Shelves In Your Office
Before you drill a single hole, gather your tools: a stud finder, level (24 inches or longer), drill-driver, socket set, and appropriate anchors or bolts for your wall type. You’ll also need a pencil, measuring tape, and safety gear, safety glasses and dust mask for drywall particles.
Step 1: Locate wall studs. Use an electronic stud finder to mark the studs in your installation area. Mark them lightly in pencil: studs in a typical home are 16 inches apart, center-to-center. For two shelves, aim to mount at least one bracket into a stud: this is non-negotiable for weight-bearing security.
Step 2: Measure and mark bracket positions. Decide your shelf height (typically 12–18 inches above a desk surface). Mark the bracket holes level and spaced according to your bracket instructions, usually 16–24 inches apart for a standard shelf. Use a level to ensure your pencil marks are perfectly horizontal. A crooked shelf wastes no time becoming obvious.
Step 3: Drill pilot holes and install brackets. For studs, use 3/8-inch bolts or wood screws rated for the bracket weight. For drywall between studs, use heavy-duty wall anchors (toggle bolts or molly bolts, rated for at least 25 pounds each). Drill pilot holes to prevent splits. Hand-tighten bolts: you don’t need to crank them until metal bends.
Step 4: Mount the shelf. Carefully slide the shelf onto the brackets, checking that it sits flush and level along its entire length. Secure from underneath with screws or dowels as your bracket system requires. Check for wobble: if the shelf moves at all, tighten fasteners further.
Honest note: If you’re not confident finding studs or interpreting wall anatomy, get a second pair of hands or call a handyperson for the bracket installation. A shelf full of heavy books crashing down is a safety issue and a frustration you don’t need. Wall-mounted systems like those detailed in easy to build floating shelves guides provide step-by-step visuals that help clarify the process.
Styling And Organizing Your Office Floating Shelves
Once your shelves are secure, the fun begins. The key to a functional office shelf is balancing aesthetics with accessibility. Don’t crowd everything together: negative space makes both the shelf and your office feel less chaotic.
Group items by function and height. Reserve one shelf for reference books or industry magazines, another for active projects or supplies, and a third (if you have it) for plants and personal touches. Taller items like book ends or a desk lamp work best on outer edges: medium heights in the middle. Vary the visual weight: a stack of three books next to a single framed photo, then a plant, then more books. This rhythm feels intentional rather than random.
Use shelf organizers sparingly. A small wooden caddy or acrylic drawer keeps pens, sticky notes, or cables contained without fussiness. Keep workspace supplies (notepads, printer paper) in closed bins rather than loose: this maintains the clean aesthetic and reduces visual clutter that kills focus.
Add greenery and warmth. A small succulent or pothos plant softens the hard edges of a stark office and improves air quality. A framed photo or two personalizes the space without looking cluttered. Warm light from a small desk lamp on the shelf (if your bracket system allows) adds ambiance for late-afternoon work sessions.
When organizing, pull items down and dust every 2–3 months. Dust accumulates on shelves faster than on closed surfaces, so a quick wipe with a soft cloth keeps your display looking crisp. For woodworking inspiration or project ideas, resources like Fix This Build That and Instructables offer detailed walkthroughs that can inform your shelf design and installation methods.
Conclusion
Floating shelves are a practical, attractive addition to any home office. They save floor space, display your work environment intentionally, and install without permanent damage or professional help. Take time with measurement and bracket placement, this is where most DIY shelf projects stumble. Once mounted securely, you’ll find they transform your office from utilitarian to inviting, all while keeping you organized and focused.